EXAMPLES — SHT HW-01 — DEEP DIVE
A SYNTH CASE, MADE TWICE.
Ada Kessler builds eurorack in her garage, which means a laser cutter next to the soldering bench. She wanted a case she could cut, build, and re-cut herself, so she made one: a bigger two-row desk mount first, to find out what she actually needed, then a single-row flat-pack once she knew. One person, a complex build, every revision kept on one sheet.
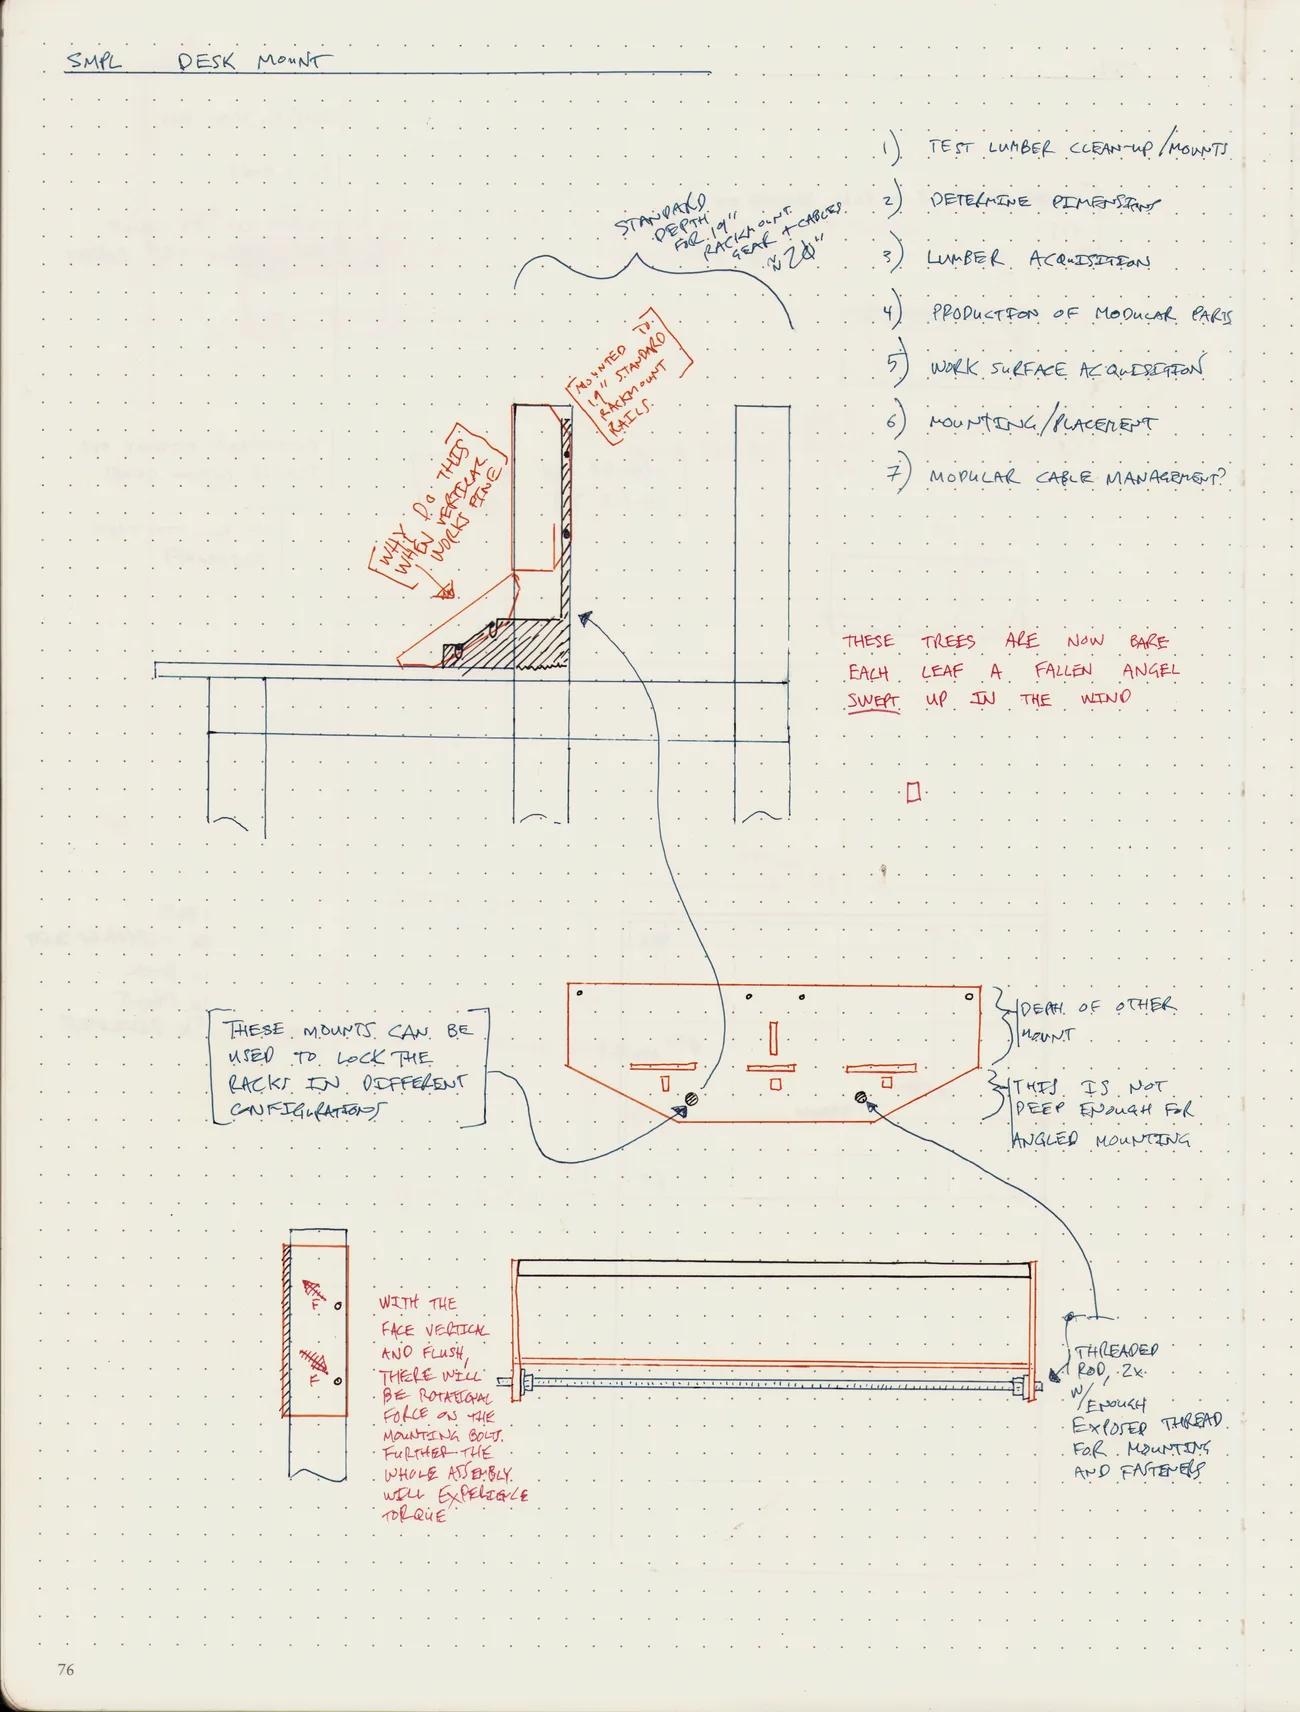
IT STARTED ON ONE NOTEBOOK PAGE: THE CASE, THE MOUNT, AND A BUILD PLAN NUMBERED DOWN THE MARGIN.
A CASE SHE COULD MAKE, AND REMAKE
You can buy a eurorack case. You cannot fix one, change one, or cut a new panel for one when you crack it. Ada wanted the opposite: something she drew, cut on her own laser, and could remake from flat parts whenever the rack changed. So the first drawing was not the case. It was the plan for making the case, and the plan for making it again.
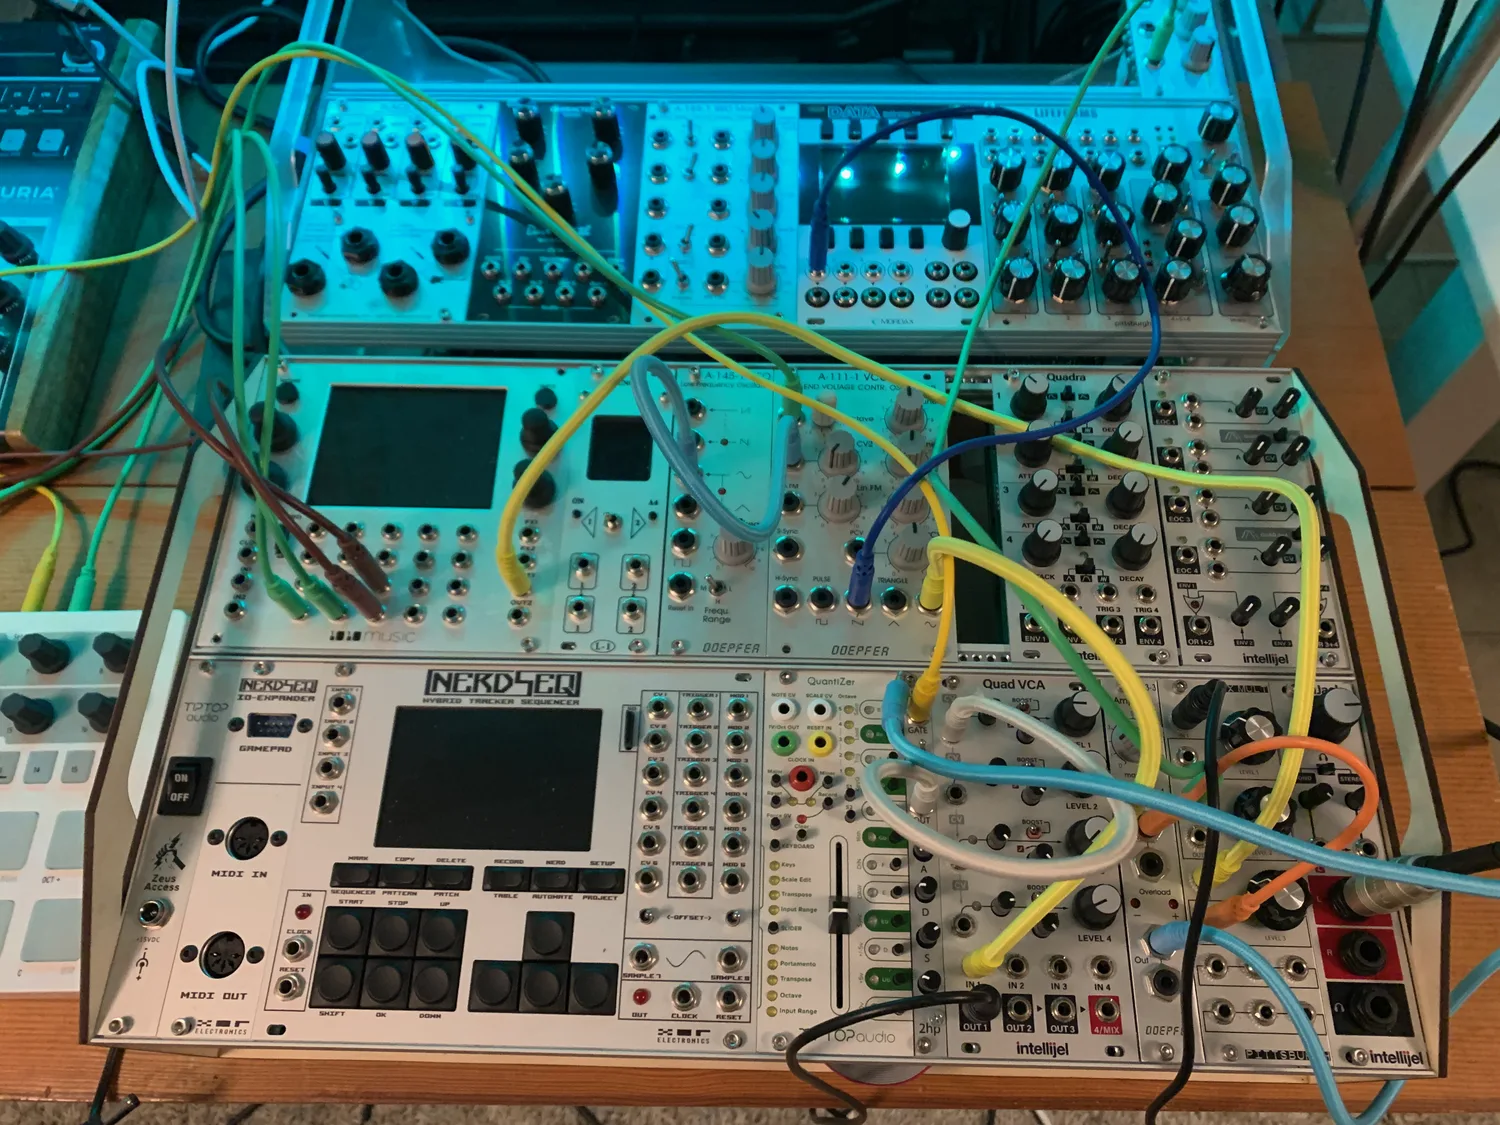
THE RACK ON THE BENCH. THE CASE HAD TO HOLD A ROW OF THIS, AND BE EASY TO BUILD TWICE.
DRAWN AS FLAT PARTS
A laser cuts flat. So every piece of the case, the sides, the base, the inner walls, the corner brackets, gets drawn as a flat outline with finger joints and mounting holes, ready to cut. This is the part that pays off later. The drawing is the part. Re-cut the file and you have the panel again, exactly.
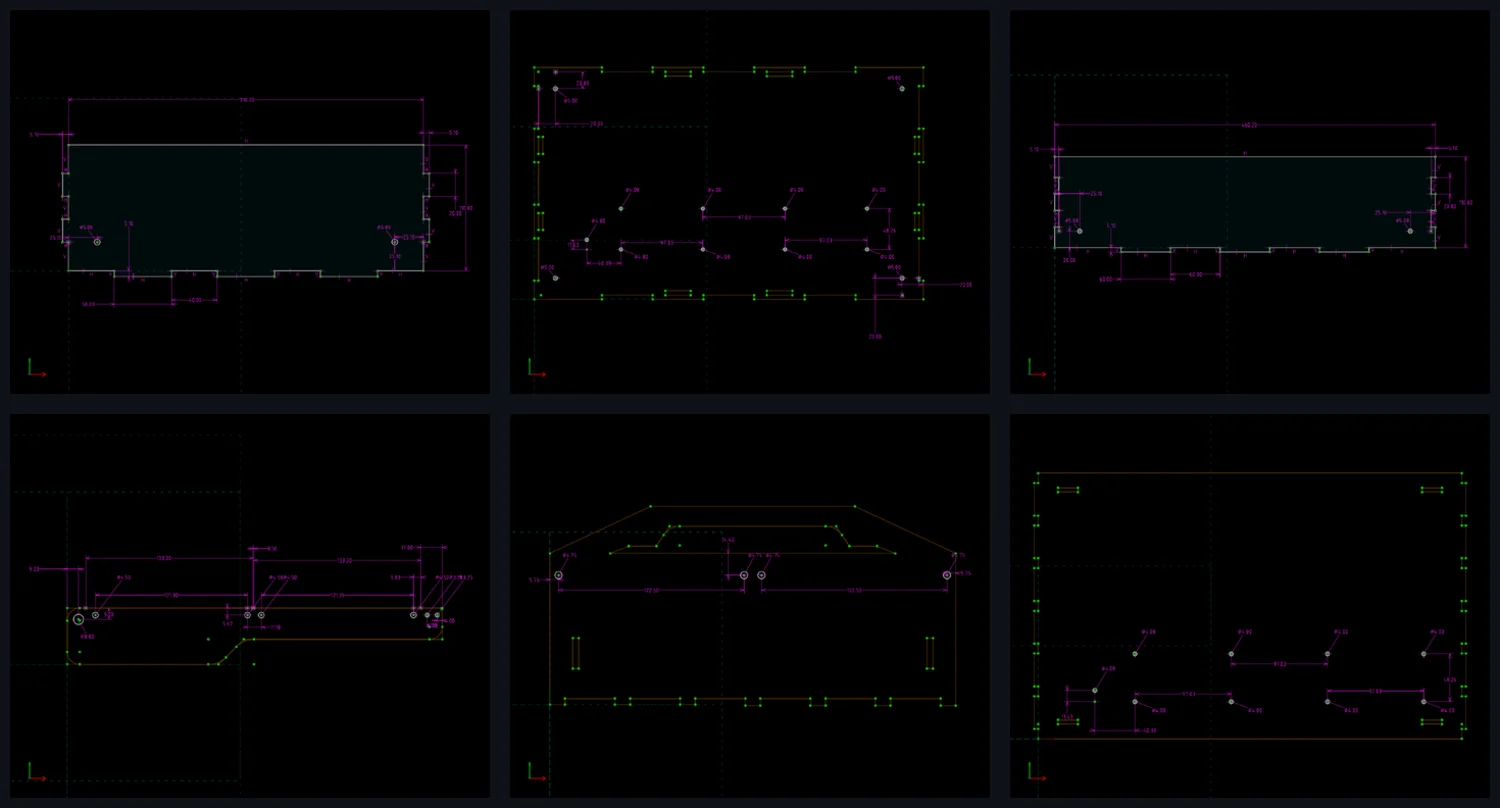
EVERY PANEL AND BRACKET, DRAWN FLAT WITH FINGER JOINTS. THE FILE IS THE PART.
REV 1: THE AMBITIOUS ONE
The first build went big. Two rows, finger-jointed sides, and a swing-bracket arm so the whole case could mount to a rear support and tilt up off the desk. It was a good problem to solve, and it stood up. It also flexed at the arm, and it taught her two things she could only learn by building it: she never once used it angled, and two rows was more case than her rack wanted.
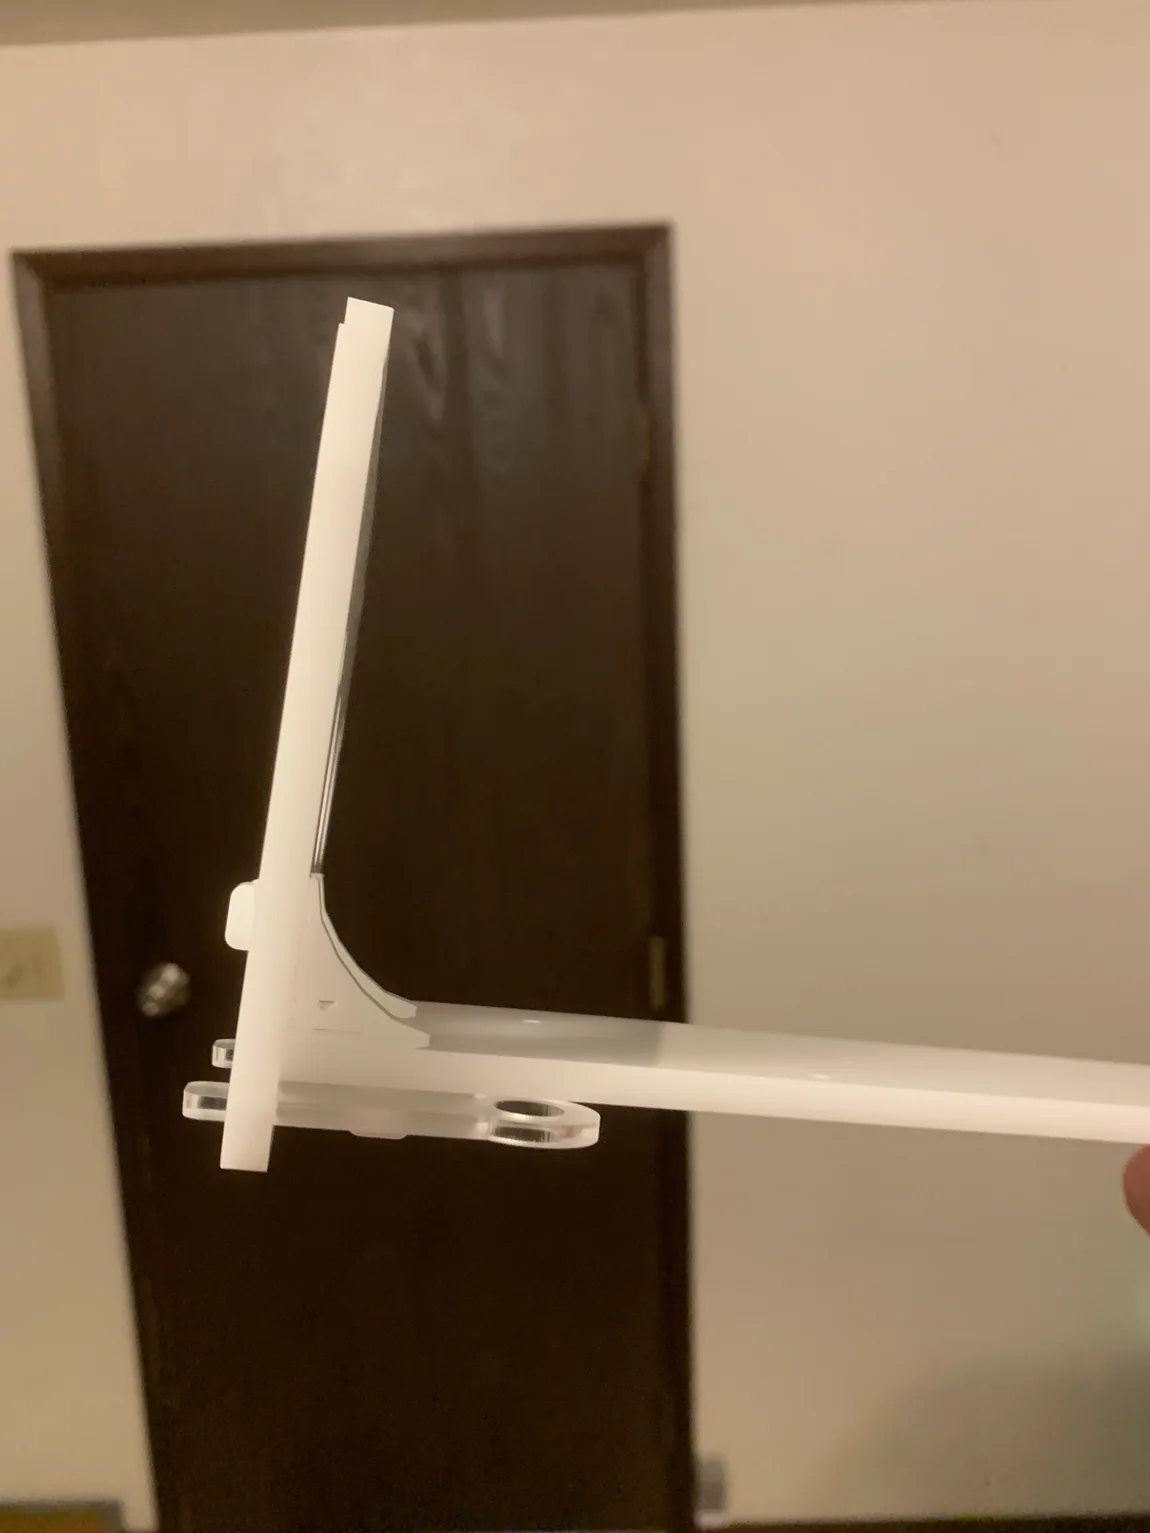
REV 1'S CLEVER PART: A SWING-BRACKET DESK MOUNT. THE PART SHE LATER DROPPED.
THEN SHE WENT BACK
A month in, the verdict was clear, and because the first build was written down, the second one was quick. One row. Flat panels and corner brackets cut from three millimeter clear acrylic. The finger joints stayed, the swing arm went, half the parts disappeared. She did not start over. She edited.
THE SIMPLER REV 2 PARTS, SCORING ON THE LASER. ONE PASS, FROM A FILE SHE ALREADY HAD.
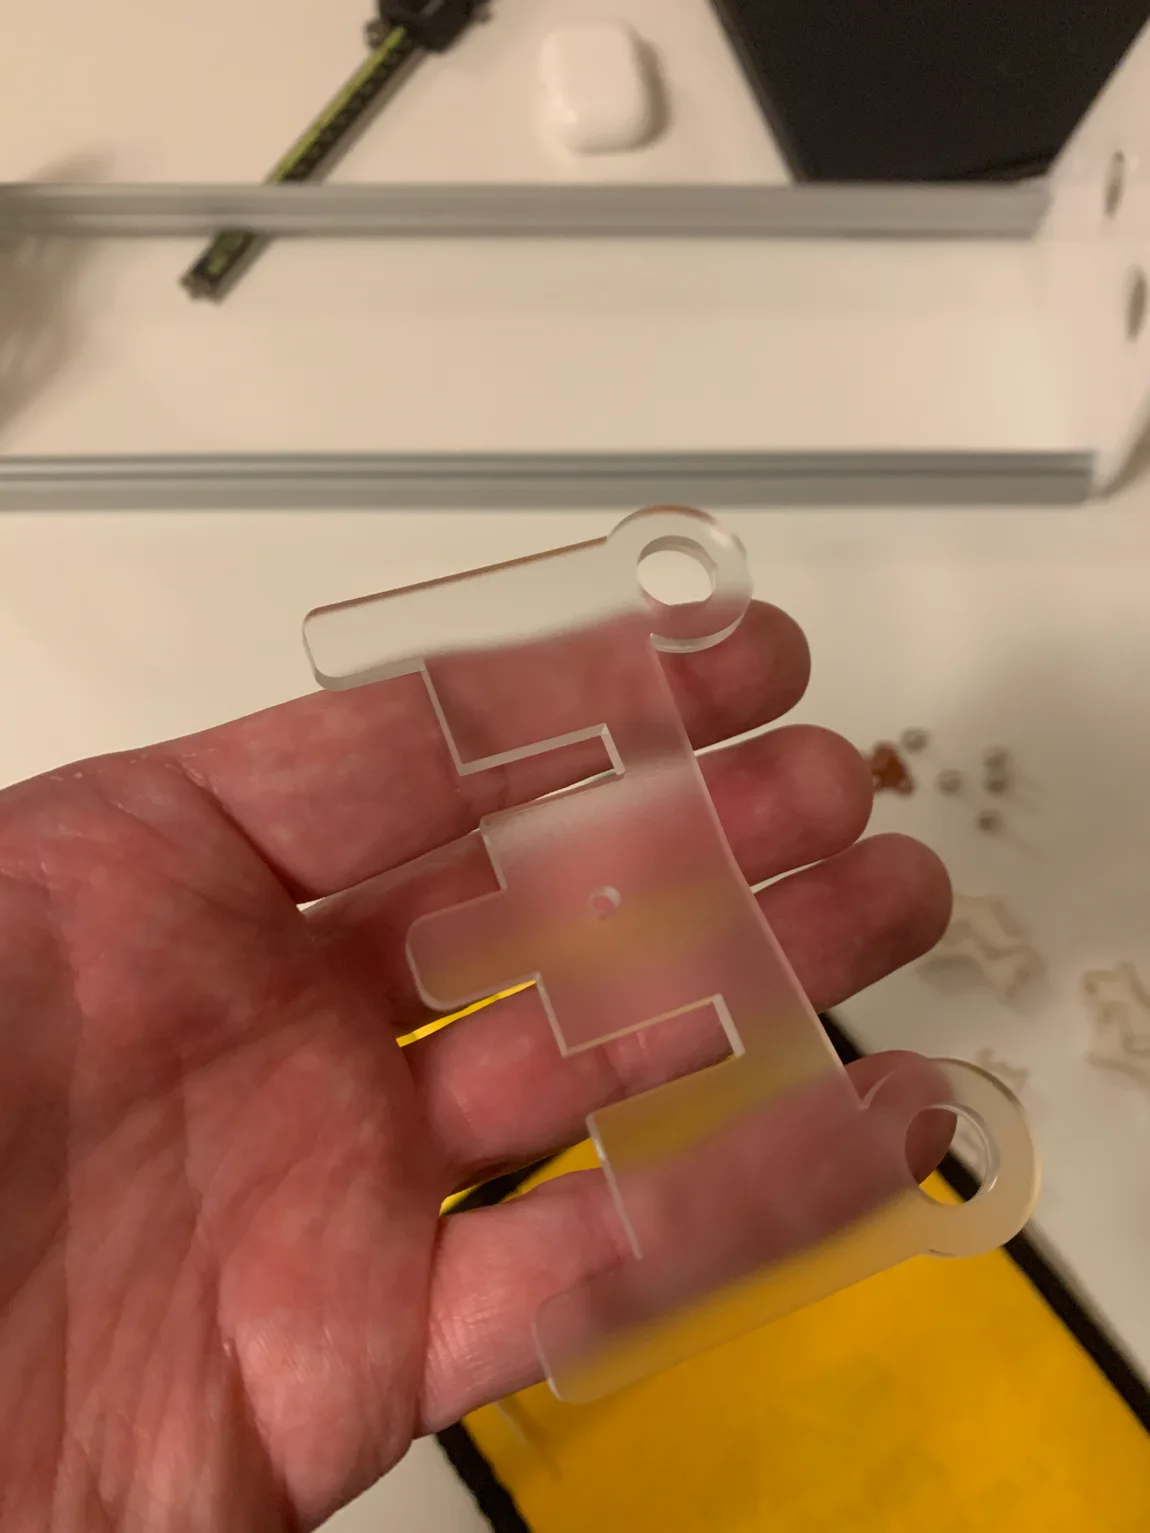
A SINGLE PANEL, FLAT AND CLEAR. RE-CUTTABLE IN TWENTY MINUTES IF IT EVER CRACKS.
REV 2: THE ONE SHE REACHES FOR
One row, full of modules, sitting flat on the bench with the side handles on. It holds what she plays, it is rigid, and it is the case she actually uses. The ambitious version was not wasted. It was the draft that made this one right.
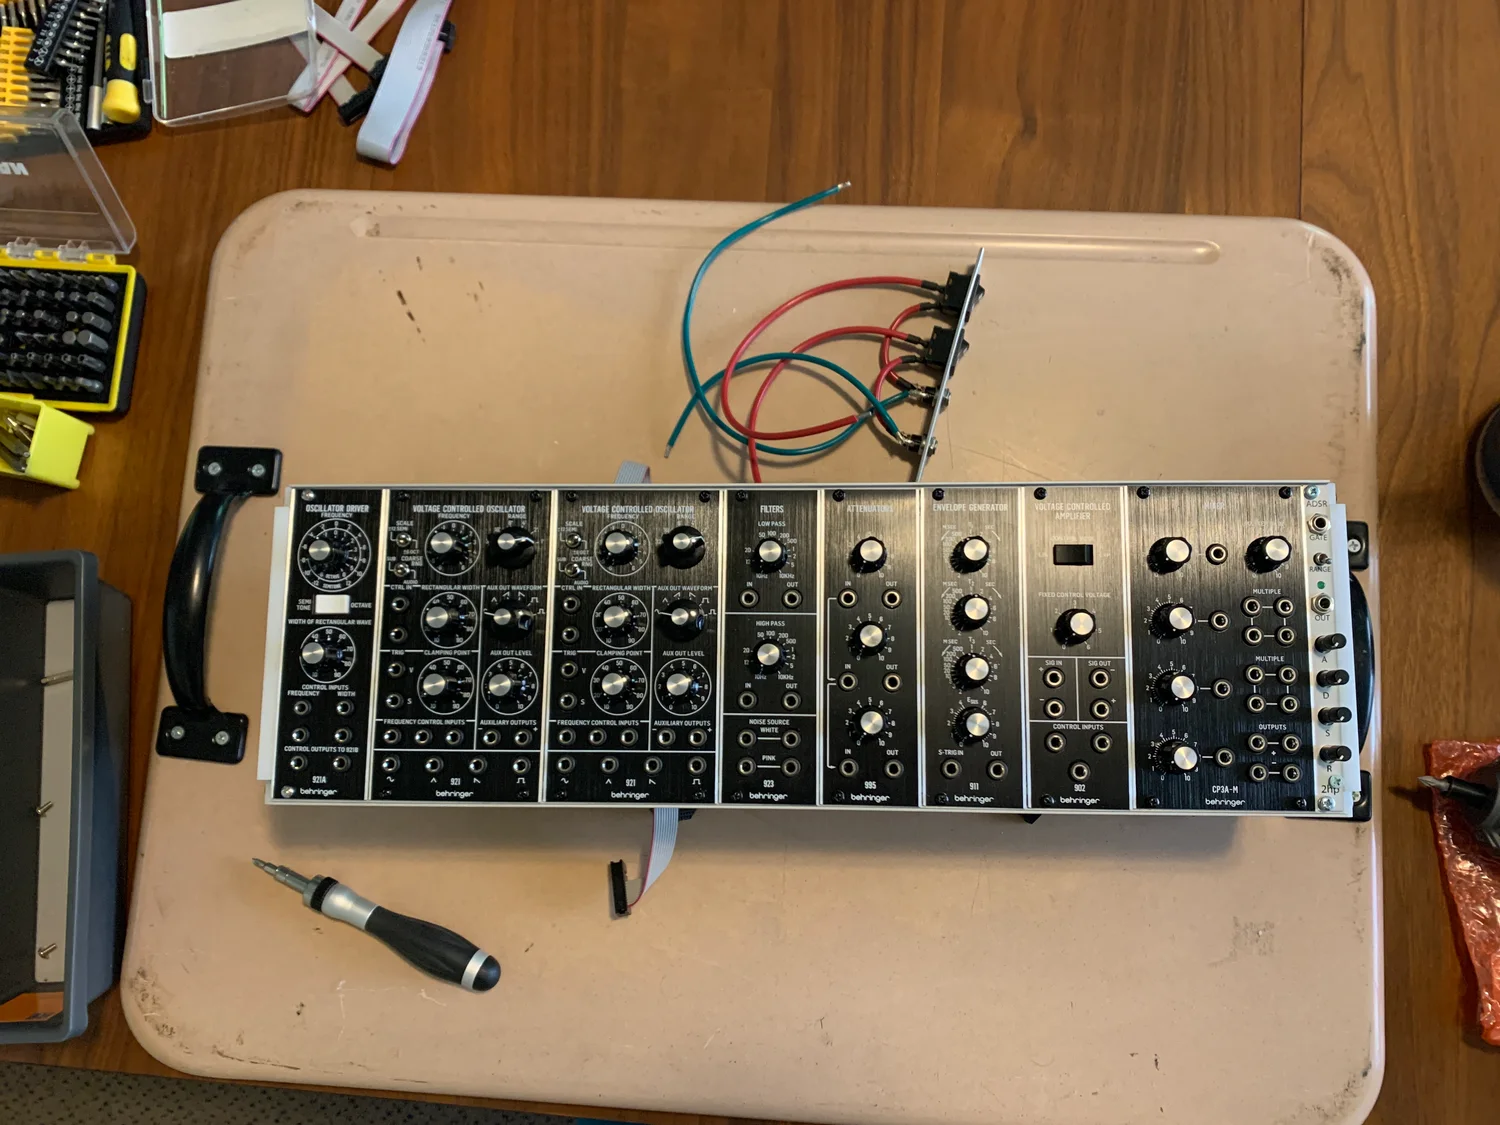
REV 2: ONE ROW, FLAT, AND FULL. THE SECOND DRAFT OF A PHYSICAL THING.
WHY THE SECOND ONE WAS EASY
A solo maker has no one to ask what the last version did. There is no teammate who remembers why the bracket was that thick or what the laser setting was. If the notebook page, the cut files, the photos, and the reasons for each change scatter across a drive and a phone and a workbench, the second build spends its first week relearning the first. Ada kept hers in one place. Here is the place.
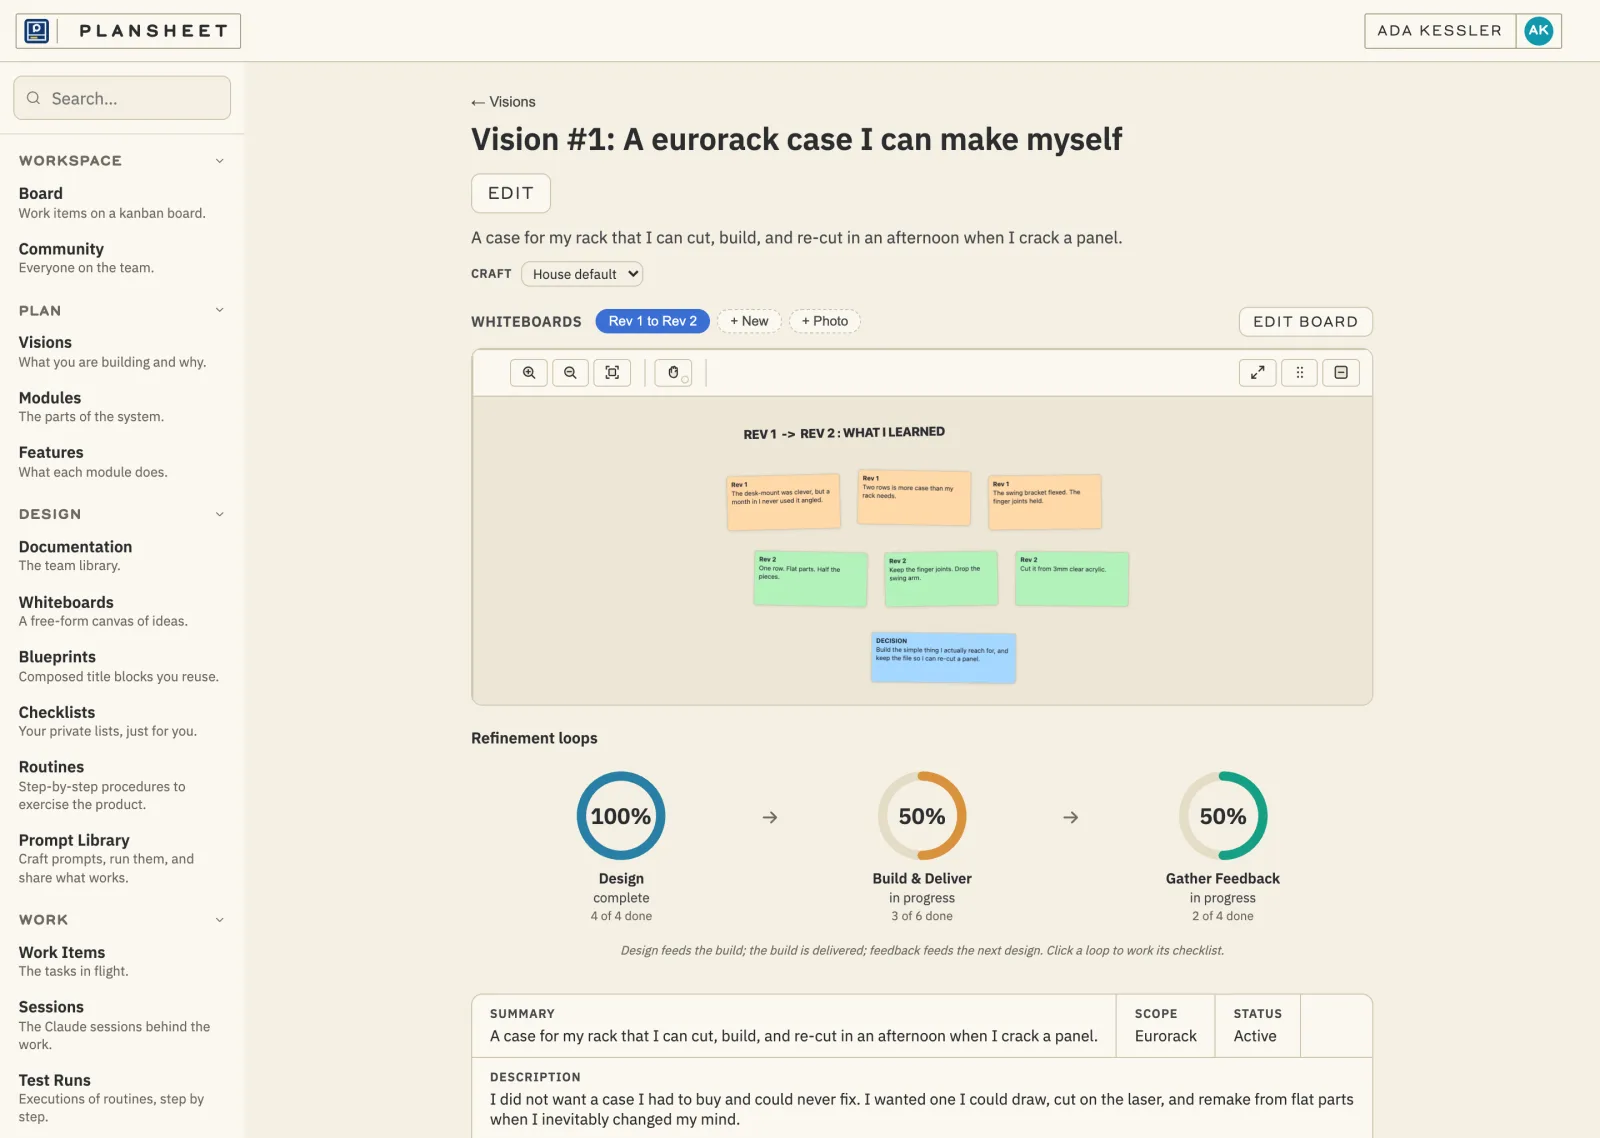
THE WHOLE PROJECT ON ONE PAGE: THE WHY, THE DESIGN BOARD, AND HOW FAR EACH LOOP HAS COME.
SHE TALKED IT THROUGH WITH HERSELF
The decision to drop the desk mount did not happen in her head and vanish. It happened on a board. What Rev 1 taught her in amber, what to change for Rev 2 in green, the decision in blue. Months later it still reads clean, which is the whole point. A solo maker's design review is with their past self, and that self needs notes.
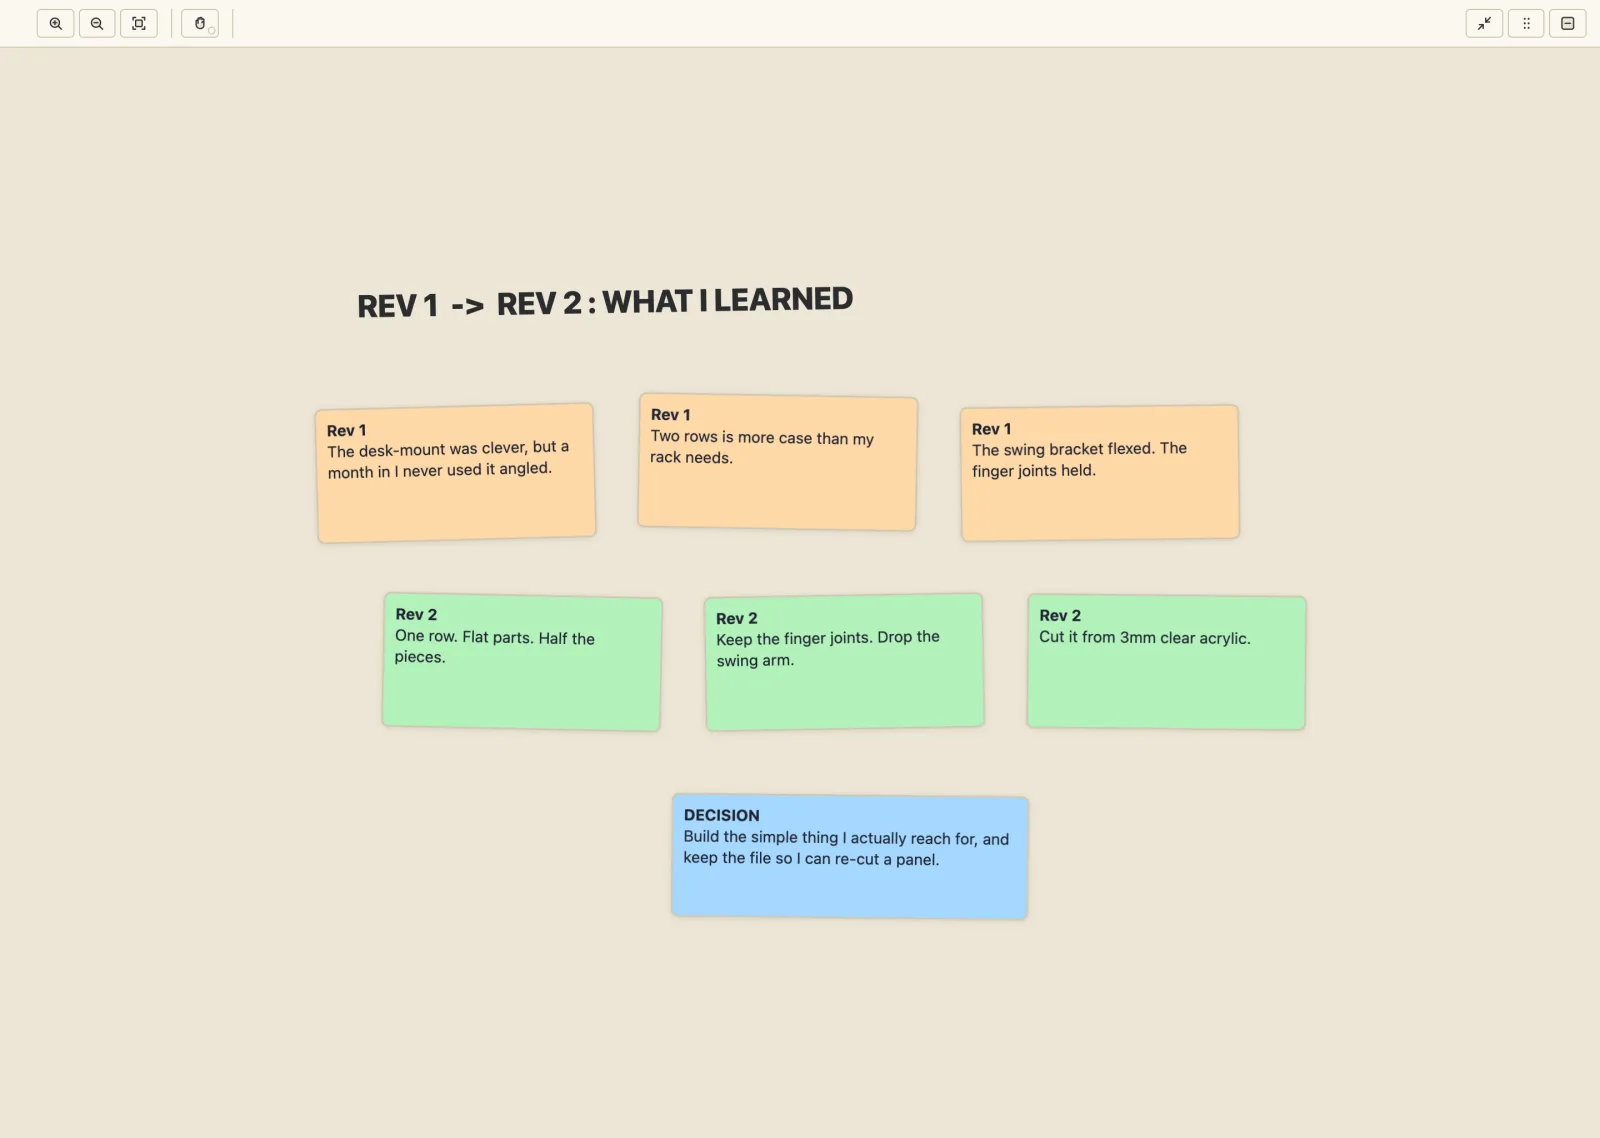
THE REASONING, KEPT. WHAT THE FIRST BUILD TAUGHT HER, AND EXACTLY WHAT SHE CHANGED.
THE SECOND BUILD IS EASY WHEN THE FIRST ONE IS WRITTEN DOWN.
BOTH REVISIONS, AND EVERYTHING ABOUT THEM, LINKED
The case is not three loose projects. Rev 1 and Rev 2 hang off it as parts of the same thing, so the iteration is drawn, not remembered. The notebook page and the rack photo sit in its media library. The work that started it is one click away. Open the case in a year and the shape of the whole effort is right there, revisions and all.
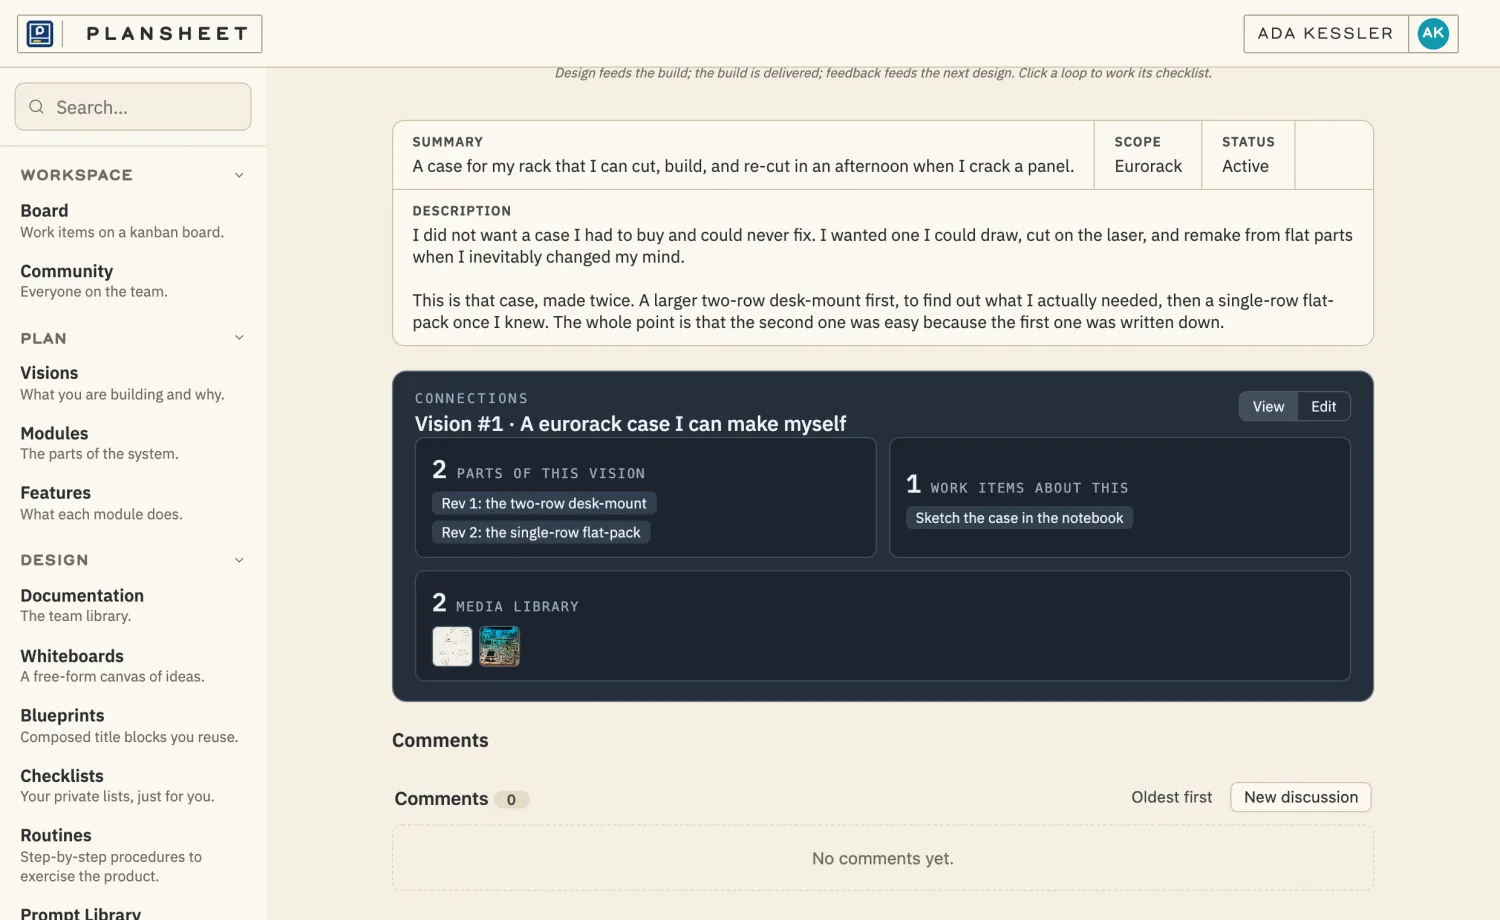
REV 1 AND REV 2 AS PARTS OF ONE CASE. THE ITERATION, DRAWN INSTEAD OF REMEMBERED.
EVERY STEP, IN ORDER
Under the visions is the actual sequence: sketch, draw the cut files, cut Rev 1, assemble it, decide it is overbuilt, redraw it as a single row, recut, mount the modules. Nine steps, including the one that mattered most, which was not a cut or a glue-up but a decision. The trail is the thing a solo maker can never keep in their head, and it is the thing that makes version two cheap.
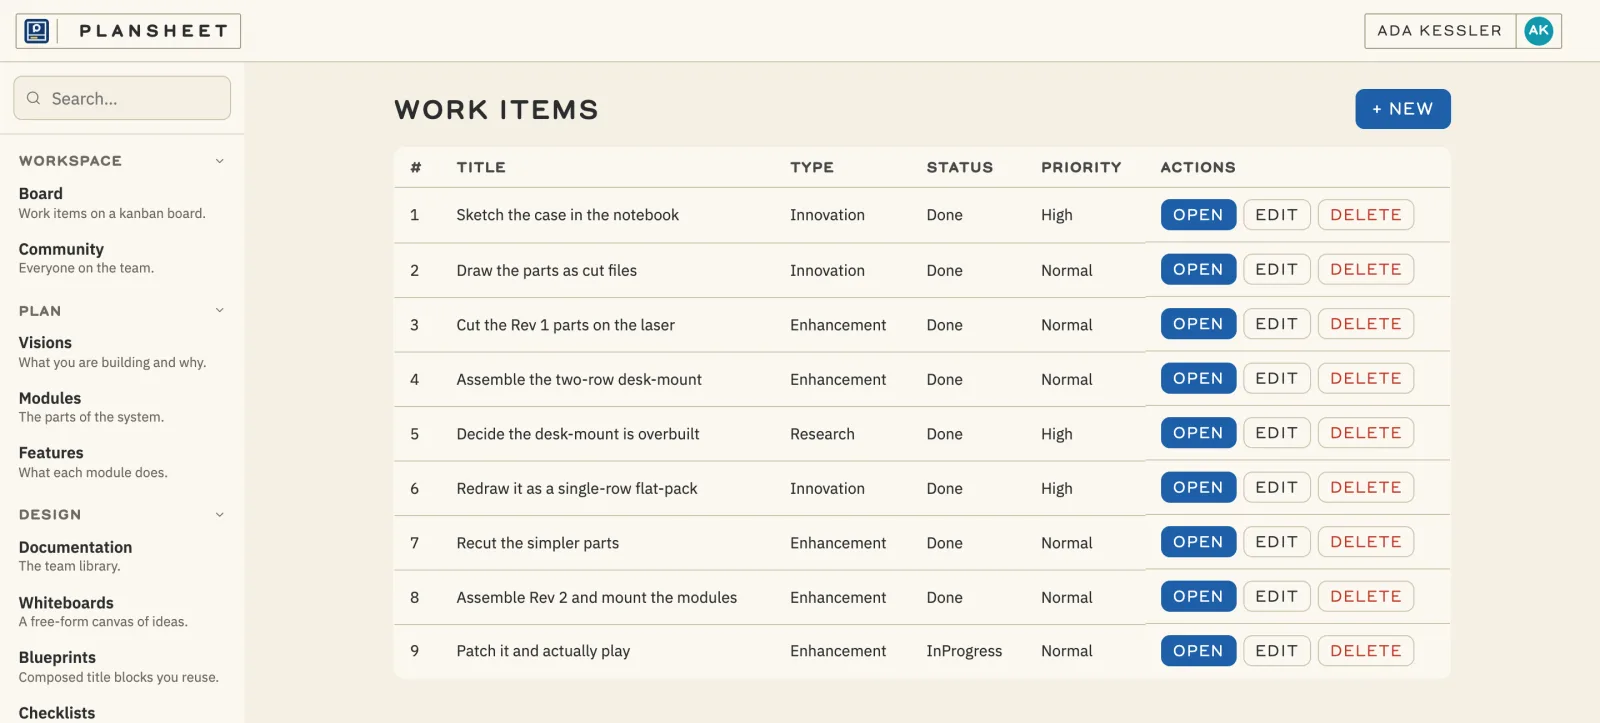
NINE STEPS, SKETCH TO MOUNTED MODULES. INCLUDING THE DECISION THAT MADE REV 2 RIGHT.
AND THE HOW-TO, WRITTEN DOWN
The last thing she wrote was the thing that makes the case truly remakeable: the cut settings and the assembly order, in plain words. Which acrylic, which laser pass, dry-fit the finger joints first, fit the rails last. Crack a panel a year from now and it is a twenty minute fix from a document, not an afternoon of trying to remember.
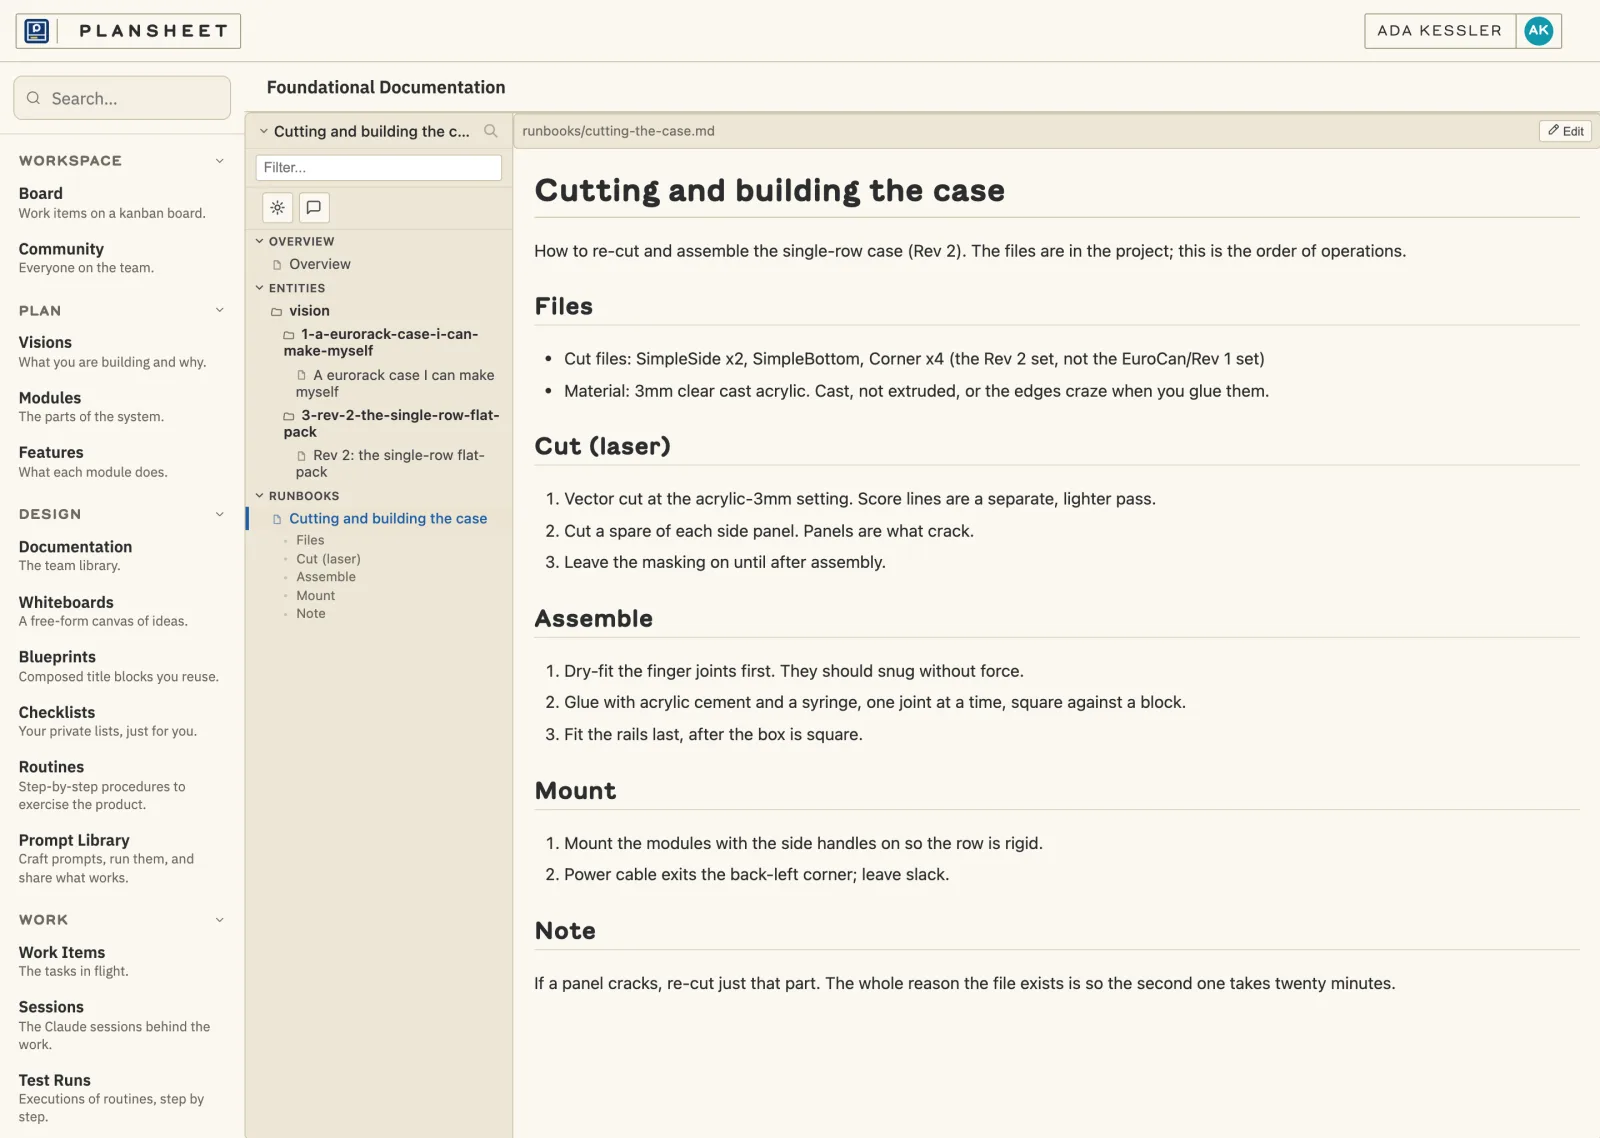
THE BUILD, IN PLAIN WORDS. SO THE NEXT PANEL IS A FILE AND A FELT-TIP NOTE, NOT A MEMORY TEST.
ONE MAKER, EVERYTHING KEPT
The design, the cut files, both revisions, the reasoning, the steps, the photos, and the how-to. Not on a phone, a drive, a notebook, and a workbench, but on one sheet that holds the whole arc of a thing that got made twice. That is what a solo creator needs most and keeps least: the trail they left themselves. Plansheet is built to keep it.
A SOLO MAKER'S ONLY TEAMMATE IS THE TRAIL THEY LEFT THEMSELVES.
THE SAME TABLE, ANY CRAFT
A hardware build is only one of the things this table holds. A sticker run, a whole software product: each one starts as a why, earns a design, gets made, and ships, and each one keeps its trail. The case is the proof that even a physical thing, iterated by one person across two revisions, fits on a single sheet.
PUT YOUR WHOLE BUILD ON ONE SHEET
The design, the revisions, the reasoning, and the how-to. One table you can open in a year and still understand.
START DRAFTING BACK TO THE EXAMPLES